Python Devcontainer with uv

uv is the new king in Python package manager land. It's fast, comprehensive and by now, well-adopted. Devcontainers provide a powerful way to create a reproducible development environment, by developing inside Docker containers. So, how do we combine the two? To find out, read along.
How to create a Python + uv Devcontainer
Let's set up our project step-by-step.
Step 1: Devcontainer.json
-
Create
devcontainer.json
This is the Devcontainer specification telling an editor everything it needs to know about our Devcontainer. Most importantly, we decide which Docker image is to be used. There are official Python images that available on Docker Hub, like python:3.13. However, this image is not meant for development. It is a minimal image used to run Python applications. We don't get things like Zsh, Git or a non-root user. For this reason, there are pre-built Devcontainer images we can use. We will usemcr.microsoft.com/devcontainers/python:3.13:{ "image: "mcr.microsoft.com/devcontainers/python:3.13" }.devcontainer/devcontainer.json... great!
-
Adding uv
To add uv, we can use Devcontainer Features: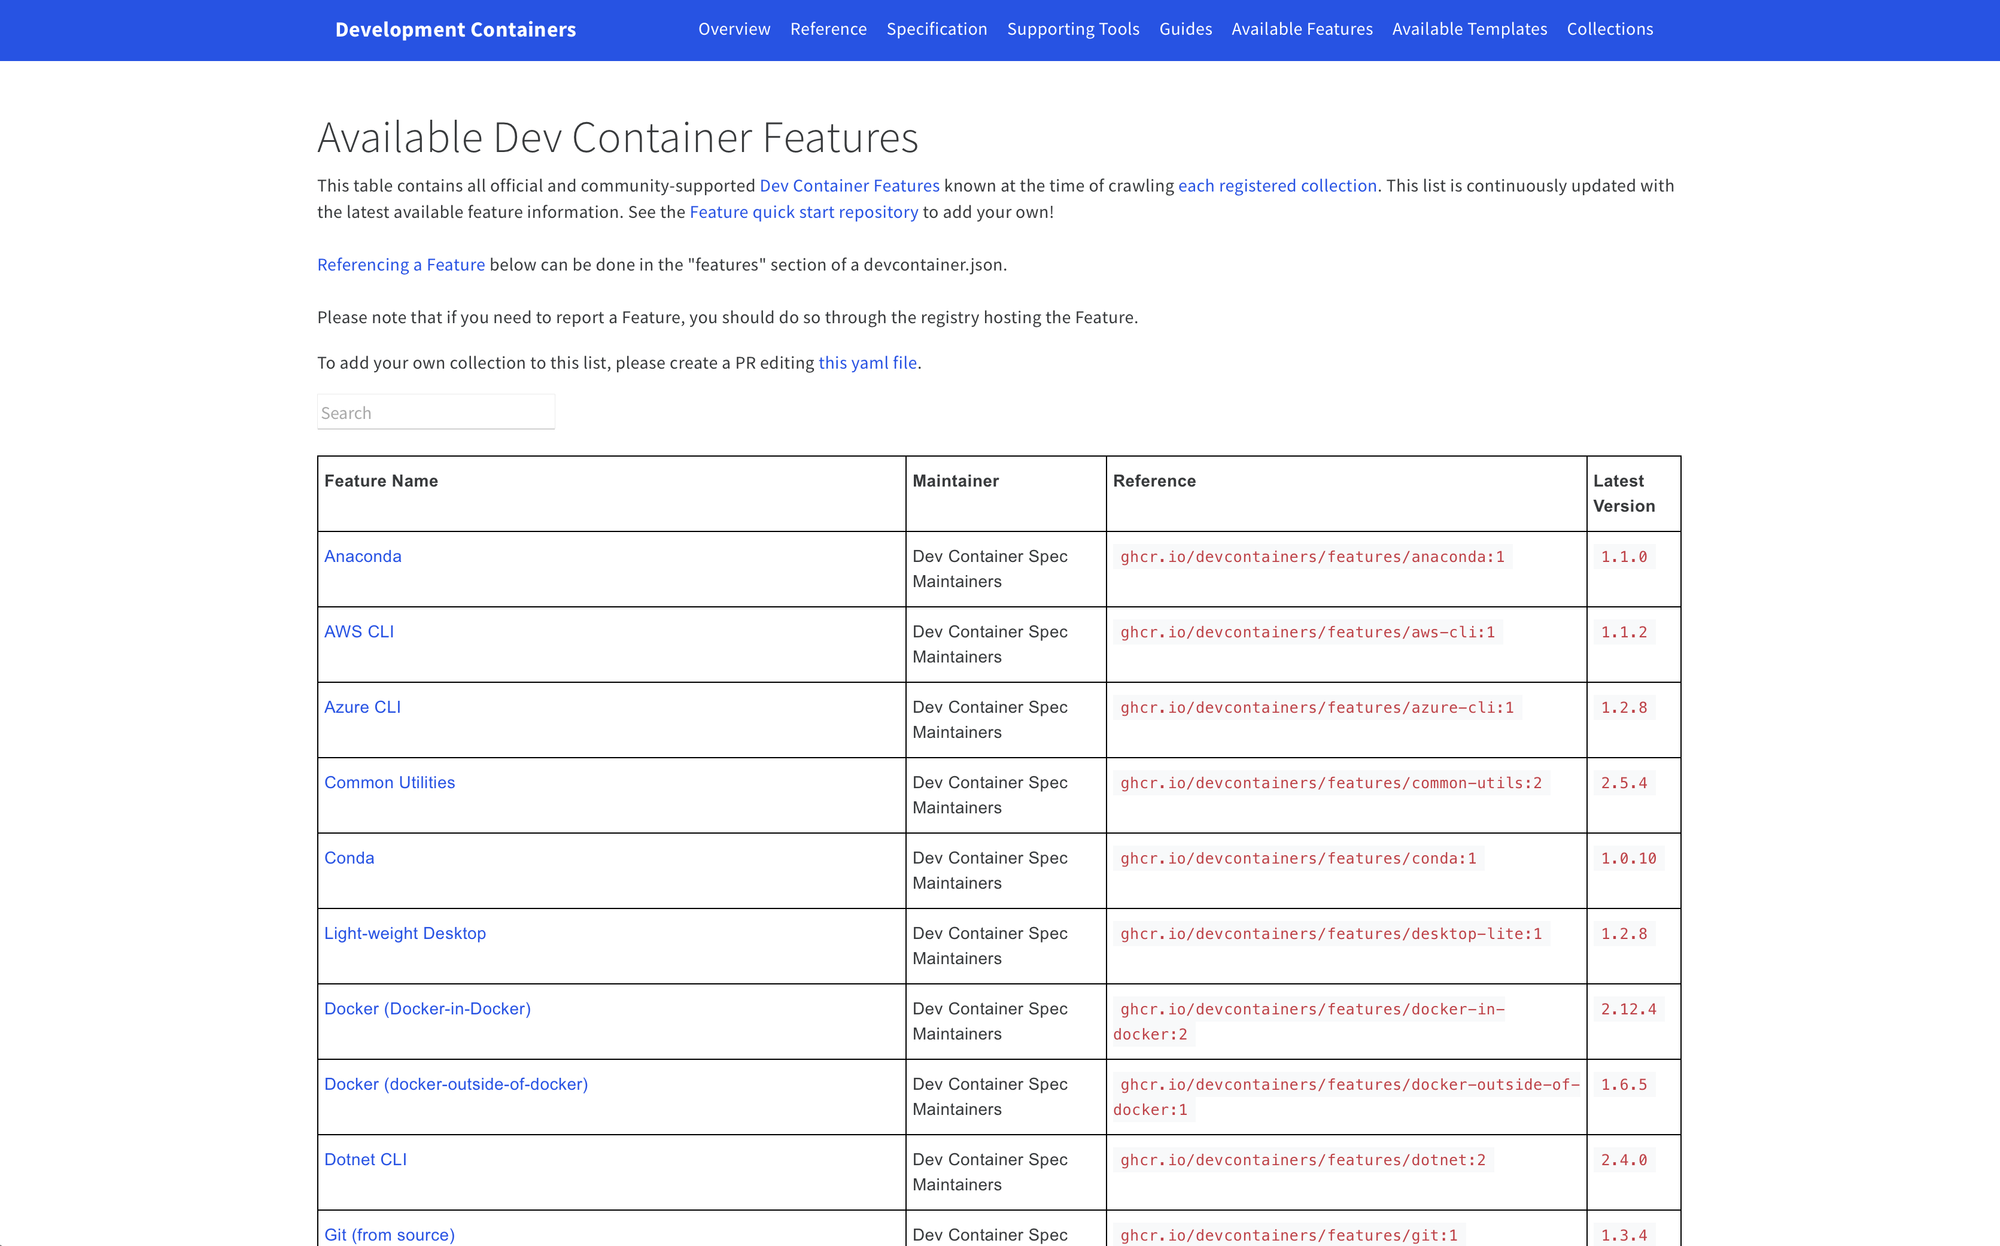
Devcontainer Features are pieces of installation code which can be added to your Devcontainer in modular fashion. They are shareable and there is a large collection of features available for us to use. So is the case for uv! There is a Devcontainer feature for uv. We can add uv like so:
{
    "image: "mcr.microsoft.com/devcontainers/python:3.13",

    "features": {
        "ghcr.io/jsburckhardt/devcontainer-features/uv:1": {},
        "ghcr.io/jsburckhardt/devcontainer-features/ruff:1": {}
    },
}
.devcontainer/devcontainer.json
... great! We also added a Devcontainer feature for Ruff. Ruff is a fast and widely used tool for Python- linting and formatting. The latest versions of uv and Ruff are installed unless specified otherwise.
-
Adding VSCode customizations
Although Devcontainers are supported by various editors, VSCode is the most common. GitHub Codespaces also uses VSCode, meaning we get full Devcontainer support in GitHub Codespaces too.We can define extensions to be installed automatically alongside our Devcontainer, by defining customizations:
{
    "image": "mcr.microsoft.com/devcontainers/python:3.13",

    "features": {
        "ghcr.io/jsburckhardt/devcontainer-features/uv:1": {},
        "ghcr.io/jsburckhardt/devcontainer-features/ruff:1": {}
    },

    "customizations": {
        "vscode": {
            "extensions": [
                "ms-python.python",
                "ms-toolsai.jupyter"
            ]
        }
    }
}
.devcontainer/devcontainer.json
... the above installs the VSCode Python extension and Jupyter extension automatically when the Devcontainer is opened.
With only just our .devcontainer.json file, we can already start the Devcontainer! Install the VSCode Dev Containers Extension and find the blue popup saying Reopen in Container:
With our .devcontainer.json file we can now open the folder as a Devcontainer in VSCode 🎉.
Upon opening our Devcontainer, the features we defined earlier are installed for us. Python, uv and ruff are all there:
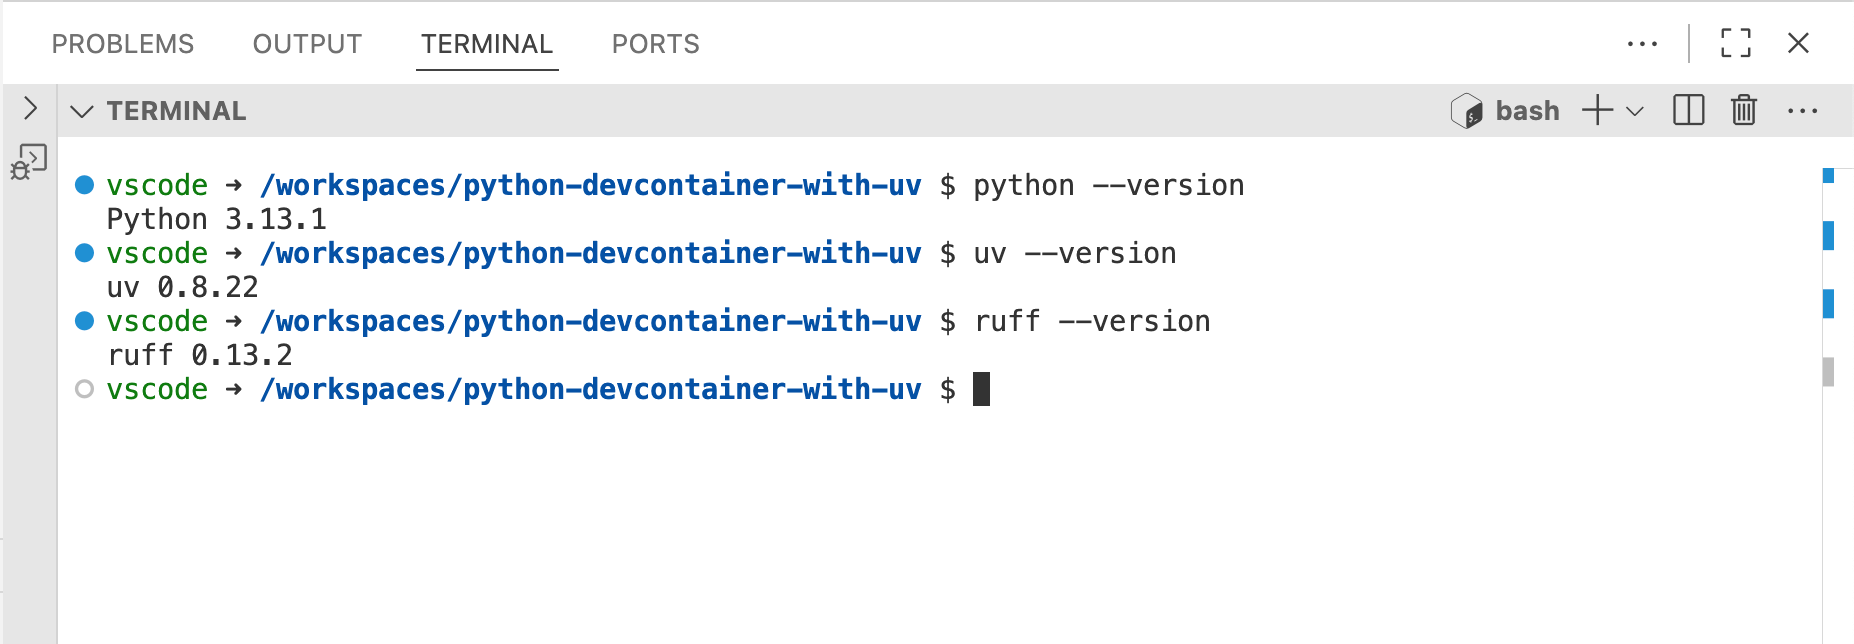
Great ✓. Let's continue with our Python project setup.
Step 2: Python project setup with uv
Now that we have a Devcontainer, let's set up our project inside it.
-
uv init
We can use uv init to scaffold a new Python project.
uv init \
  --package \
  --name example_project \
  --description "Example Python Devcontainer project with uv"
uv initcan be used to create Python projects. The--packageargument creates asrcfolder structure.... which scaffolds a project structure for us:
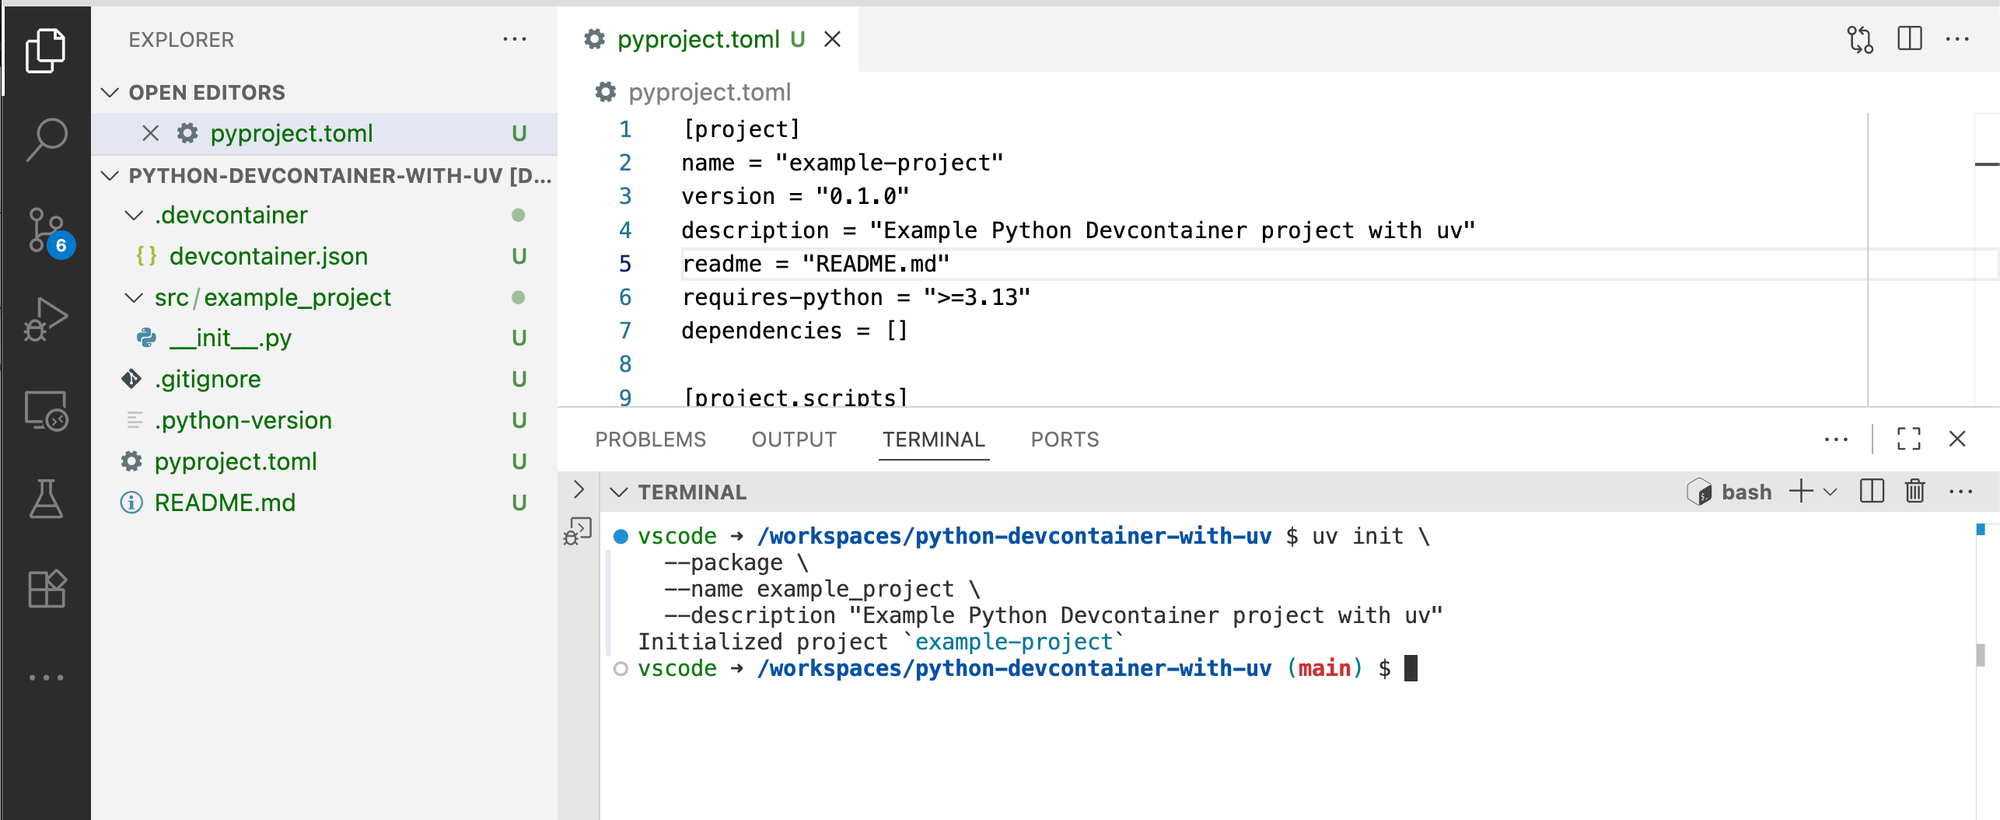
A freshly initialised uv project. Importantly, a
pyproject.tomlfile is created. This is the main configuration file for our Python project. Besides configuration, it keeps track of dependencies. Let's add some dependencies. -
Adding dependencies
We want to test our code, so let's add pytest:
uv add pytest --devUse
uv addto add new dependencies.uvupdatespyproject.tomlfor you. See uv docs Managing dependencies.... upon installing, VSCode also detects a virtual environment being created:
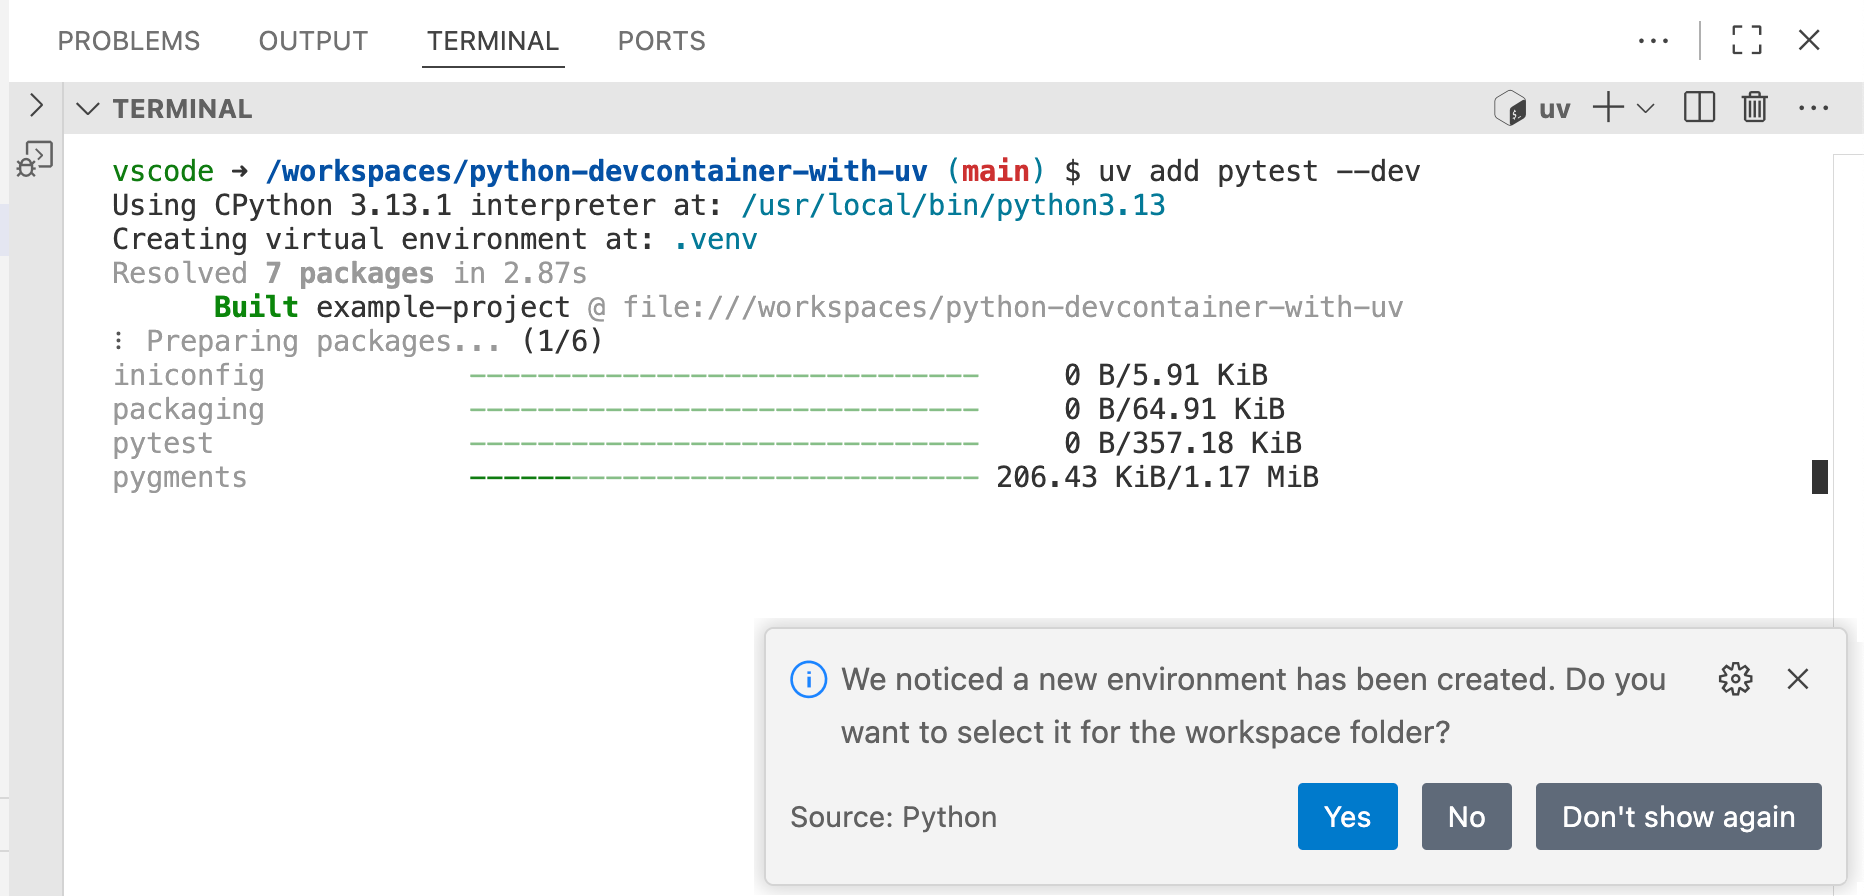
VSCode hints the user to select the virtual environment once it is created. Select the virtual environment. Notice that after the installation uv has updated our
pyproject.tomlfile.💡If you missed the notification, open the command palette (CMD+SHIFT+P), type Python: Select Interpreter and select./.venv/bin/python. -
Running tests
Let's now add a test so we can validate our setup is working.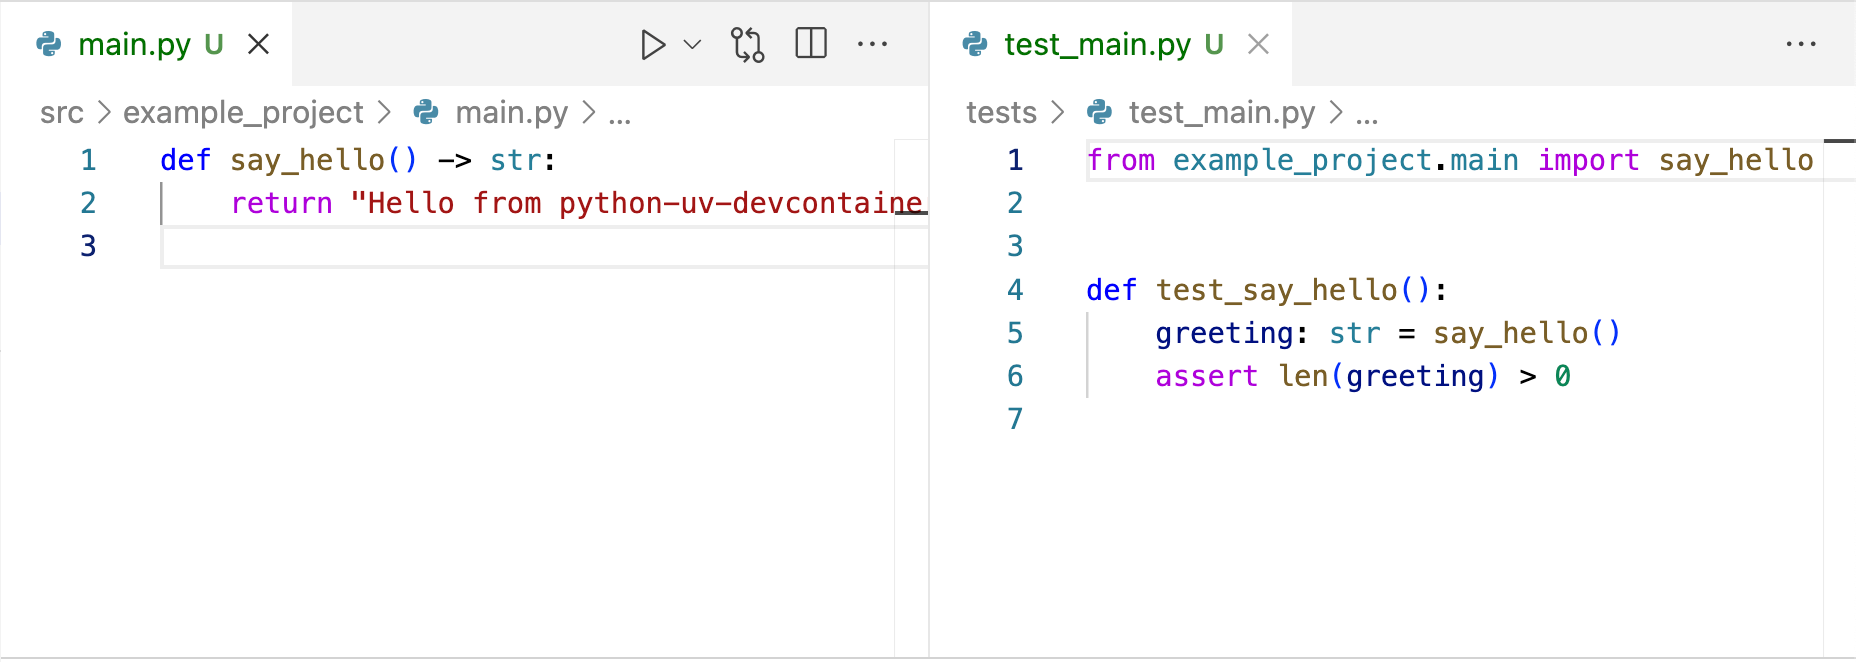
A simple function and according test. ... which we can run using:
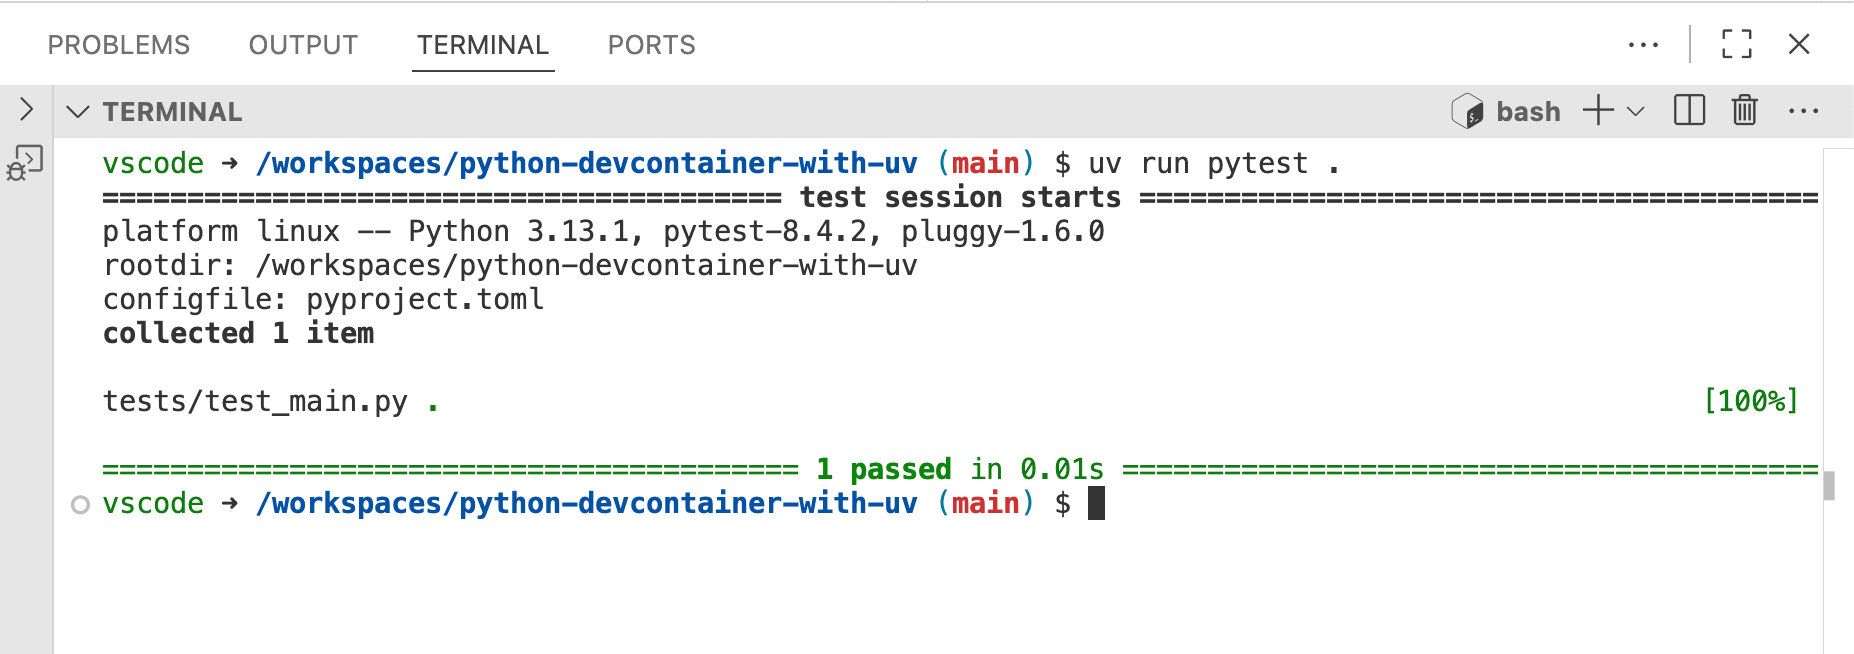
uv run pytest .Use
uv runto run shell commands with uv. The command ensures its run with the correct venv.Resulting in ... a passing test! ✓
Our test passes ✓. The environment is correctly setup. Also, feel free to use the VSCode UI:
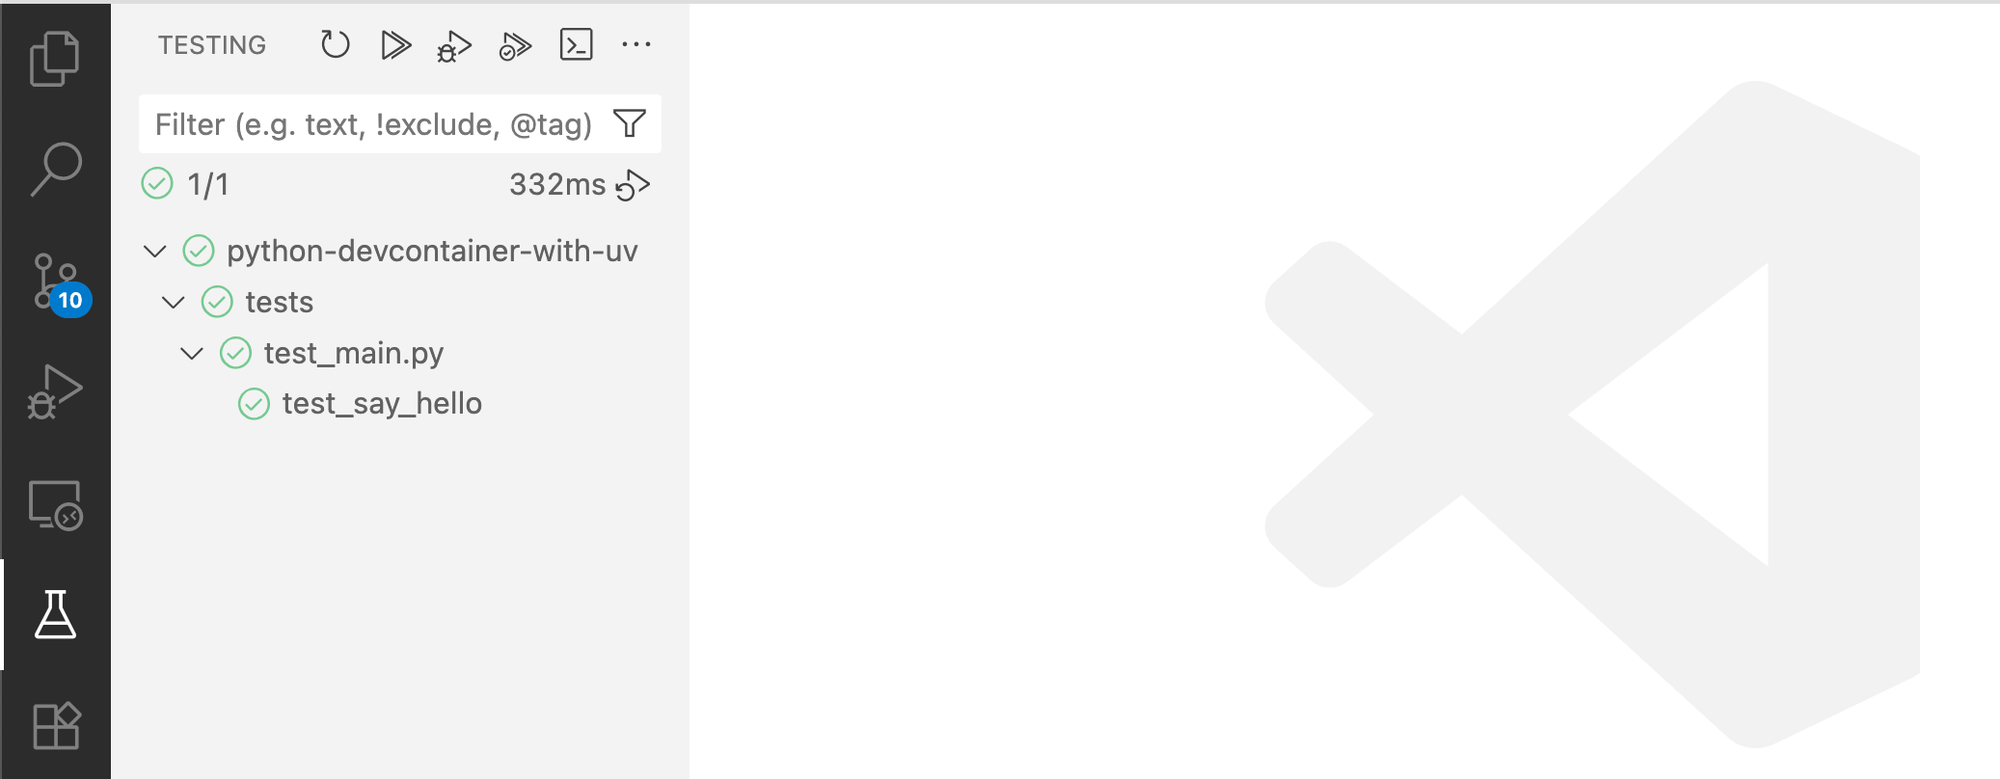
The VSCode testing UI. Awesome! 🎉
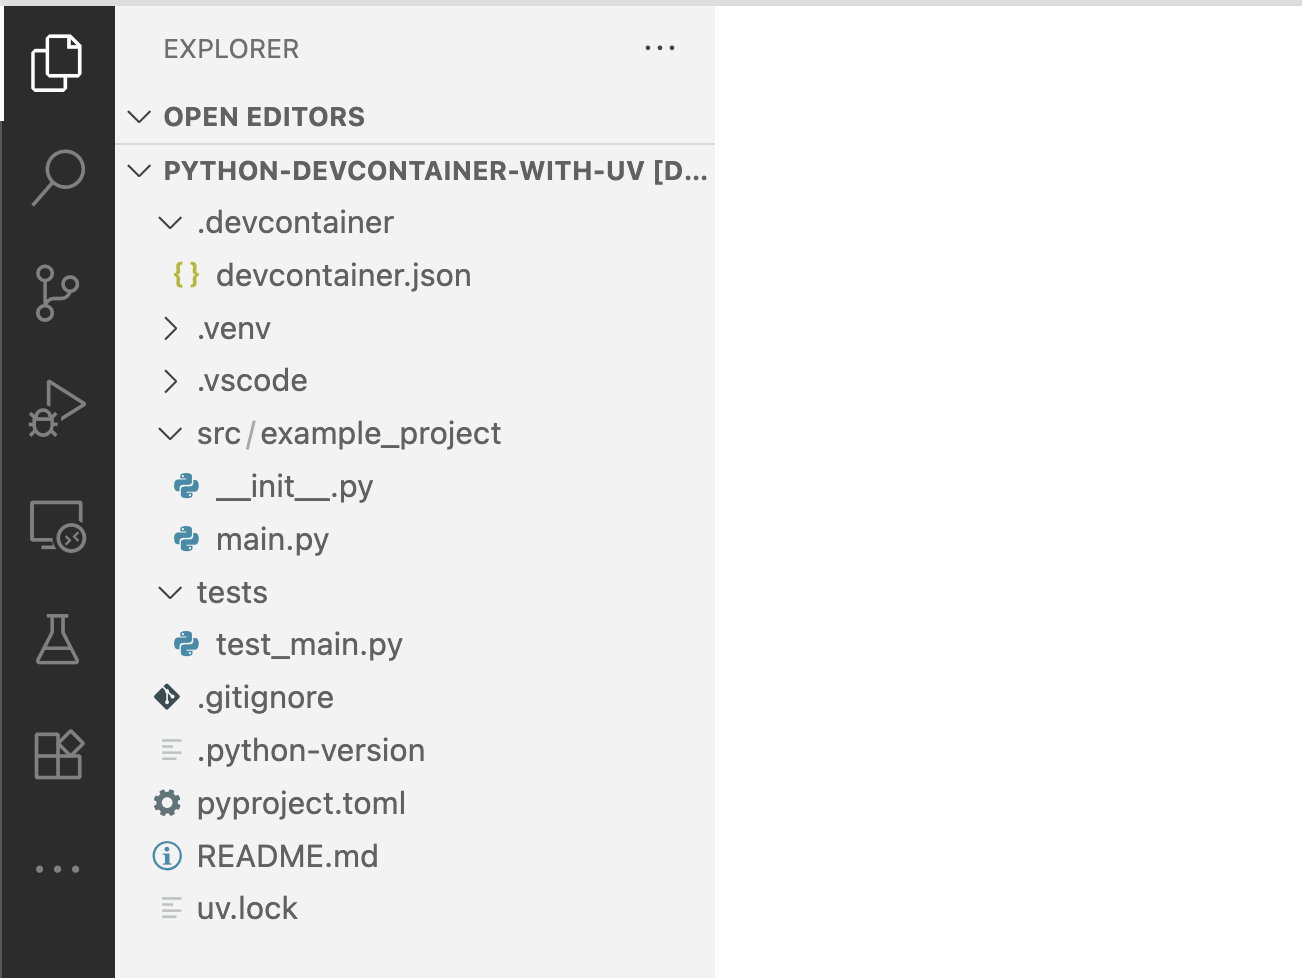
Final setup
At last, our project looks like the following:
For ease of use, this GitHub repository is available and can be used as a template:
A GitHub repository template for a Python uv Devcontainer.
... the repository also comes with some Extras: a GitHub Actions workflow for CI/CD and a Dockerfile for production deployments. Enjoy!
Conclusion
That was an adventure. We set up a Devcontainer using a devcontainer.json file, we added uv and ruff by using Devcontainer features and set up our Python project using uv init, uv add and uv run.
uv is a powerful tool and combining it with a Devcontainer gives us an easy and reproducible project setup. Good luck with your own Python/uv Devcontainer setup! 🍀